Light through the side of the wall…


the-price-of-freedom

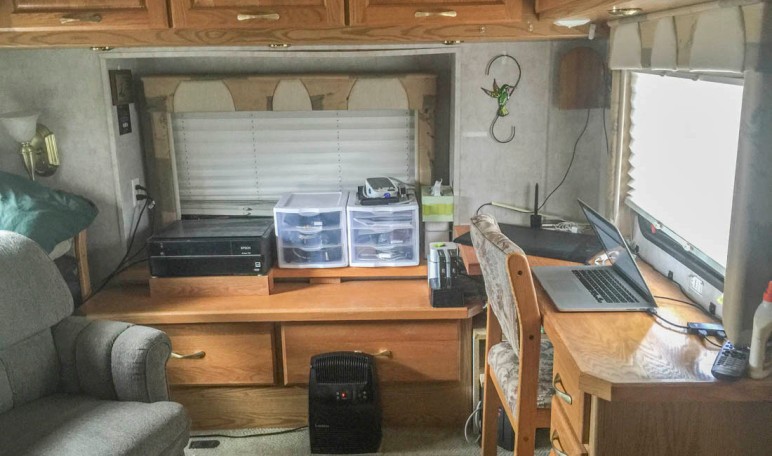
What does it mean when you’re sitting in the lounge and you see daylight underneath the sofa?  Clearly, it’s not something good. That was what I noticed the other day.  A quick walk outside and a maintenance problem appeared that was easy enough and inexpensive enough to fix.  I like that kind of problem!

After a quick trip to Home Depot for the proper size screws I refastened the piece of weatherstripping that wipes the bottom side of the lounge slide-out. Over the last 11 years that in and out motion of the slide (extended, retracted, extended, retracted) had stressed the few attachment points of the rubber gasket and pulled a few of the screws loose — allowing the gasket to move away from the wall and allow a little light to come in — and a little cold as well — and potentially little critters also — but we have not had that problem.  There really should have been more attachment points.  I could see that easily. And now there are.

20161201074656498
a couple of the added fasteners – the old fasteners simply weren’t adequate to hold the weatherstripping with longterm use.

The Price of RV freedom is eternal vigilance!  If you own an RV you just have to keep checking and checking to make sure that all is well with your ride, your house, your little bit of heaven.

In over 5 years we really haven’t had a lot of things to fix with our RV.  Some of them were shear wear and tear worn out — the toppers over the slides were like that.  And 11 years use from a piece of fabric out in the wind all the time is — I think — a pretty reasonable expectation.  And of course there was the Norcold replacement.  I’m sure we could have had the old one repaired but I was tired of the inadequacies of the Norcold system so that was a personal choice on my part.

But my point is that you find little things that need attention.  Caught early they are small repairs; left to worsen they can steal your bank account.  It’s all up to you.

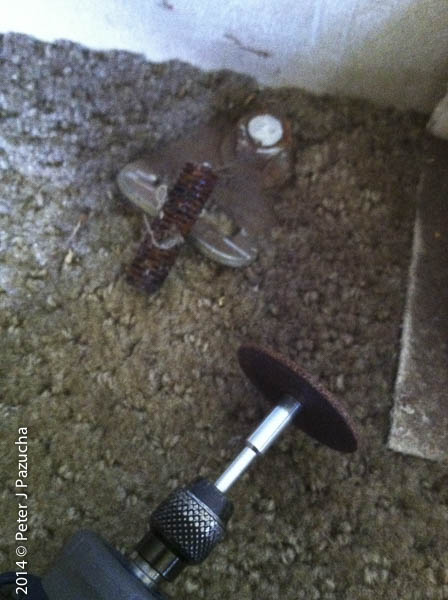
After fixing the weatherstripping at the bottom of one slide I did an inspection of all four slides and there were no more problems.  Little things like that happen on a vehicle that might not happen on a house.  RV’s are subject to a lot of shaking and vibration. A few months ago I found a lower body panel shaking in the wind — it was right by the wheel well and when I got down on my knees and looked up at it I saw that a machine screw had fallen out.  Replacing the old screw with another of the same size (and a little Lock-Tite) and all was well again.

osb-plywood-1
Oriented Stand Board (or OSB) may be a wonderful product, but when subjected to water it puffs up and loses it’s strength

Most RV’ers I’ve known have discovered problems with the gaskets around their slides when leaks occurred.  But it’s not that hard to inspect the gaskets every few months and insure that they are sealing correctly.  After all, sometimes it’s just a matter that the gasket material has curled under and running your awning hook up and down the length of the gasket will un-curl the gasket — returning your RV to the “land of all is well.”  The problem can be bigger — weatherstripping does get old and brittle — sometimes it needs replacing (not often, but some of these RV’s are still on the road 20 years after manufacture). No one wants to wake up and find a puddle of water in the RV!  Worse… no one wants to deal with the damage that water can do to OSB — the material so many RV manufacturers seem enamored of!

2014080708135405
The layout of our coach roof was not simple BEFORE we put 900 watts of solar panels up there. Now it’s even more congested. It pays to check on that stuff from time to time.

Among the many checks that are worthwhile to do are a regular inspection of your roof.  You know, most people can’t see what’s going on up there on top of the RV.  I know I’m not tall enough to do so!  And a lot of RV shops will do a free roof inspection when you have the RV in the shop for routine maintenance.  If you have a motorcoach like we do you are going to want to change the oil (at least) annually — what better time to have someone get up on the roof and look for leaks, cracks that aren’t yet leaks (in caulking), etc., before little maintenance issues become much bigger repair bills!

I like maintenance.  Maintenance is cheaper than repairs.  Maintenance is good.  Us RV’ers should repeat that like a mantra, “maintenance is good, maintenance is good, maintenance is good…”

Thanks for stopping, and I’ll be here to chat tomorrow.  Why not stop and see what’s up!

Pull Strap Improv

Do you cringe when you hear the word “Engineer”?  I do!

Awning strap-hook
The ubiquitous Awning Pull Strap
Awning End View
End view of the roller bar with three insert channels. In and of itself this is a clever idea. If only they hadn’t botched the design by making it harder to replace parts that deteriorate with age.

Sometimes it seems that engineers try to make things much harder than they really need to be. Take the pull strap on our Carefree of Colorado over-the-window and over-the-door awnings as an example.

I’m sure you’ve noticed them — even you non-RV’ers out there.  The pull strap hangs down below the bottom of the awning and you… guess what… you pull on it to open the awning.

Well, all the awnings I’ve seen are built with rollers, or “Roll Bars” that the awning fabric wraps around and those rollers have three slotted keyways.  The awning fabric slides into one of them. The pull strap slides into another.  And accessories like lights can be slid into the third.

open awning channel
Life would be easier if they designed the channel so that it was open on the end.
closed awning channel
Instead they put a cap on the end of the tube and made it impossible to remove the strap without taking the end cap off (or at least removing the old pop rivets, rotating the cap, inserting the strap, rotating the cap back and re-riveting the cap.

Eventually those nylon pull straps deteriorate with weather and moisture — as did our strap for the over the door awning.  Imagine my surprise when I looked at the replacement parts kit and found Pop-Rivets!

It turns out that the engineer who designed the awning thought that the best thing they could design was a slot that you had to disassemble the entire end cap of the awning (up some 12 feet in the air) in order to slide the pull strap into the slot.

Well, RV’ers are a clever bunch, we are (well, someone else was, I just learned this trick).  It turns out that you can take a 1/4” drill bit and a drill motor and drill into the channel about 1/4” — effectively making a 1/4” opening into the channel.  The old torn pull strap can then be coaxed out of the channel and the new pull strap can be inserted into the channel and you are all done.  No cursing, no sweat, no precarious maneuvering at the top of a ladder.  Done!  Finished.  Complete.

The thing is,  we rarely even USE that awning….

Thanks for stopping by, and I’ll talk with you tomorrow.


Progress: it feels good

2014040213241327-40PLQAfter a year and a half I think we can safely say that we’re finally getting Serendipity (our current coach) to the point that we have most of it the way we want it, instead of the other way around, with most of it needing tweaking in some way or another.  The flip-flop has been a long time coming but it’s the way we do things:  live with something for a while before jumping to conclusions about what needs changing.  Then handle upgrades or changes as needed — when you really know how you live with that thing.

In the last month and a half I’ve added new hardware, new storage, rearranged a lot of things and gradually been turning Serendipity into a coach that was easier to live with.  None of the changes mean we bought the wrong coach — they are pretty much all trying to find the right place for things that we had grown accustomed to being in different places in our previous coach.

The office is done — as you can see from the feature photo.  This week I added a couple lightweight storage bins — I’m tired of having cords hanging from all the cabinets.  The hard drives are mounted and accessible. The graphics tablet is usable.  I’m happy.20151013115622022015101210271611

While I was happily working in the office Peggy has been staring at the corner of the lounge wondering how to make THAT area more usable.  During one of our shopping forays she found a set of drawers and a nice matching basket and now the corner table deftly hides a few pillows and throws while the drawers will do a nice job of hiding a few papers and cords and what-nots.  Hoorah for Progress!

How many ways to RE-Set

helpdeskAsk any IT Helpdesk person and they’ll tell you that 50% of their job involves resetting & rebooting devices.  When any modern, computerized device hangs up the first thing we ought to try before calling for help is to reboot the machine, or reset it.

My Verizon 6620L MiFi quit suddenly a day or so ago.  With RV park WiFi I haven’t had a critical need to get it fixed but it’s not something I like to go without for very long.

Knowing that the number 1 solution for computer problems has long been a simple reset — to allow the computerized device to reset itself back to known conditions — I tried resetting before going to the local Verizon store.

Typically you turn your machine off and then on again.  That forces a fresh re-boot.

In this case I could not turn it on, so turning it off wasn’t the solution.

I KNOW that the battery was still at 1/2 power — I checked it before turning the MiFi off the last time.   No luck.

6620L ResetSo, I tried hitting the reset button — inside the back plate, hidden in a small recess on the back of the box.  NO luck.

I tried holding the OFF button on for a 10 seconds.  Sometimes an extended holding of the button will work as a ‘reset’ switch. NO luck.

backplate and batteryI tried removing the battery, leaving it out for 1/2 a minute and then replacing it.  No Luck.

Those were all the variations I could think of so I took the box along with me to the Verizon store.

Guess What?

There’s another way to reset this particular electronic device….

Remove the battery, and hold down the on/off switch for 10 seconds.

And guess what…

That fixed the problem.

Seems no matter how I try I still can’t help but looking the idiot at the Electronics store.

Thanks for stopping by, and I’ll talk with you tomorrow.

Sparks Fly!

You remember that microwave/convection oven I’ve been talking about?  Well, there’s some more to the story than you’ve yet heard. 2015081117565401 I wanted to check out the outlet before Mike and Katy arrived.  I had noted at the time the unit quit working that the plug seemed difficult to pull out of the wall.  I didn’t do anything about it at the time — the timer was working, the clock was working and the appliance would function for 59 seconds at a time — I thought the problem was just with the internal circuits.  Well, I tried to pull the plug from the outlet and it was not going to come. 2015081109504203I got out a screwdriver, which I used (after turning off all  power to the outlet) between the plug and the outlet to twist and remove the plug.  There was clear signs of arcing on one prong.  The plug had essentially welded itself inside the outlet.  There were no signs of heat on the wall — but as you can see there were signs of heat on the face of the outlet. 2015081114544807Well, that’s not good, is it?

110VAC receptacle
an RV type outlet — with locking back cap.

If you haven’t looked at the back of your electrical outlets you may not realize that the outlets in most RV’s are not like the outlets in a sticks & bricks home.  Most RV’s do not use outlets inside electrical boxes.  They use self contained outlets with rear covers that serve the same purpose as an electrical box. You don’t find those at Home Depot or Lowes, so the first problem was finding an RV dealer who might have them, and then getting one.  As a back up plan I did get a standard outlet and a box — just in case — these I can now return to Home Depot in the morning when we drive past the store on our way to the laundromat. 2015081114541805 I looked at the insides of the box after pulling it out and considering that it’s been back there in situ for 11 years and I did know about the the obvious one time heat the box didn’t look too bad.  No real way to tell WHY it happened other than an excessive draw on current. So, with the new outlet in place we’re ready for delivery of our new micro — and the manhandling of it into place.  Even the installation directions tell you to use 2 men to set it into place — at 70 some pounds — at odd angles and extended out beyond your body by 2 feet — it’s not going to be a “pretty” install, that’s for sure. smiling moose saloon smiling moose dining roomAnd there you have most of my Tuesday.  The job only took 1/2 an hour.  Finding a replacement outlet, driving to get it, and then accidentally’ having to stop and have a bite of lunch at the Smiling Moose Bar & Grill in Hudson — that took most of the rest of the day. I had hoped that I would get at some more of my projects today, but by putting first things first and taking care of that outlet I at least got the most important one done first so I’d be ready for my helpers.  Now, maybe tomorrow I’ll get at some of the others. The weather is forecast to be beautiful and I’m enjoying this summer to bits! Thanks for stopping by, and I’ll talk with you tomorrow.

Decimate the To-Do List

Saturday was a right productive day! And even though Peg is still under the weather I was crackin’ my to-do list down to size.

First up was the front curtains.  You may remember that last September we scrapped the windshield curtains that came with Serendipity.  What we replaced them with were pre-made thermal backed curtains from Kohls which we sewed to size using Melanie’s sewing machine.

At the time I realized what I had not investigated at the time of purchase — the manner in which the electric drop-down sunshades were mounted.  And I discovered that for some reason the ‘mounting bracket’ on one of the shades had not been used and instead whomever installed the shades had used wire-ties to hold them in place.  Except by tying around the curtain track the wire ties were preventing the curtains from being drawn past the centerpoint of the coach — or tightly closed together.

2015021410021801I bought the parts to do the repair MONTHS ago.  But aware of the fact that once I started the fix I had to finish it before we went traveling again — and I put that job off again and again. Until Saturday.  An hour or so on the job and the slides are now free for the curtains to go as far as they want, and the shades are securely mounted.

It’s nothing earth shattering but each step brings Serendipity closer to being “ours” in every way.  

By the way, you’ll notice my IPASS transponder on the windshield.  We received notification that our transponder has exceeded it’s predicted life and we need to replace it.  That’s on the list of phone calls to be made this week. If we were in town I could stop at a Jewel/Osco or at the Tollway Authority service centers and replace it — as it is I’ll have to mail it back to IL and have it shipped to me.

2015021418035702Second on the list of projects was re-organizing the cabinet with the BluRay machine, the DISH Network receiver and the Satellite Antenna box.  This has been an annoyance since we bought Serendipity.  What I needed to do was pull them all out, straighten out the wiring mess, reorganize how the wires are pulled through the chassis, and then secure them with Velcro and button everything back up.  If you ignore the fact that at first I was attempting to plug the antenna wire into the wrong receptacle on the back of the controller, then the job progressed nicely and in short order.  If you factor in the time it took me to realize that I was half blind and stupid,…. well, we won’t talk about that.  It’s nothing fancy but now I can disconnect the antenna dish when we are stationary for a long time (once the antenna is pointed you don’t need power to it until you want to stow it for travel),  The way it was wired the antenna box remained powered on until we turned it off for travel.  Just a waste of electricity.

2015021411005403
The size of the cutting wheel 1/2 way through the bolt, and the size of the cutting wheel when new! — 2 per bolt
2015021411123107
Cutting tool, cut bolt, and the remaining stud. some day I’ll get a nut cracker and remove the bolt entirely, but it’s not in the way this way.

Then I finally got around to removing the seatbelts from the floor where the old sofa formerly sat — and my new recliner now resides.  All I had to do was get out my Dremel hobby tool and cut through the bolts and the seatbelt but getting down on the floor is easy enough — and getting back up isn’t — so I put that job off until today’s nice weather.

Then there was my pneumatic storage box.  Bob Flanigan was nice enough to show me how he built a box to store his air hose and attachments for the coach.  Our Holiday Ramblers come equipped with air chucks at the front of the chassis so that we can air up our tires, or whatever tasks we might have that can be performed with pneumatic tools.  I have been waiting for a decent day to tackle it.  Today was that day.S85-8873P01WL 2015021418043903

Previously I had purchased a new Jigsaw to replace the old one that I downsized out of when we went mobile.  Truth be told it was 30 years old and probably needed replacing, several times over — but now I have a new plug in jigsaw.

I built the box out of 1/4″ plywood and some 3 1/2″ pine boards so that it would fit behind the  generator access door on the front of the coach.  The box will mount to the pre-existing brackets inside and provide convenient access to hose, chuck, and other parts.  2015021418183201

While I built the box today I used Liquid Nails to glue the box securely together (with screws to hold it until the Liquid Nails cure).  Tomorrow (or Monday) I’ll buy the bolts to fasten it in place and put it to use.  Hooray!

And in between all of that I still had time to hop in the pool and hot tub and to sit on the patio in the pleasant evening breeze writing.  I love it here!

Thanks for stopping by, and I’ll talk with you tomorrow.

Curtains!

We’re still in Oregon — or at least it FEELS like an Orgon winter:  damp, wet, and 40-ish.  Anyone who wants to know how it feels to live in Oregon — but who lives in S. Texas — no longer need wonder.  You’re livin’ it!

But in all seriousness, while the weather is a bit on the gunky side we’re doing our best to do something other than watching endless TV.

Our friends Bob & Janice Flanigan — with a matching coach to ours — made a very simple change in their coach which we have been admiring our our minds ever since they stopped off in Grenada to visit.

I have talked about the fact that in our 32′ Journey one of the features we most liked was the side aisle.  Our bed lay lengthwise and from the roadside edge of the bed you could see all the way to the windshield without obstruction — right along the side of the coach.

2002 Winnebago 32 TD
This is our old Journey 32TD

One of the features we did NOT like — and we thought about it more and more the longer we had the coach was the fact that the refrigerator was mounted in the roadside slide — adding a lot of extra weight to be extended and retracted each time the slides were activated.

The newer ’05 Ambassador does not have a side corridor.  Which we have adjusted to.  We like the fact that the refrigerator stays in one place.  And although the kitchen moves, the heaviest part of the kitchen is the microwave.

2005_ambassador_40plq_floorplan.jpg
This is the original floorplan of our coach
2006_ambassador_40plq_floorplan.jpg
This is the new configuration — not much change but better for us.

Since acquiring our new home these are the positional changes we have made.  The table for the printer is on the curbside wall,  The recliner is up front and now we are ready to make changes to those curtains on the door and the wall between the bedroom and the bathroom.

On the bathroom side of the door and wall are mini-blinds.  Soon the mini-blinds will be history.   and we will replace with with voile curtains — to add a little more light, while still providing some privacy.  Privacy isn’t a huge thing for the two of us but for visitors it might be. 🙂2015010213541403

We bought 84″ curtains with pre-sewn curtain rod pockets on the top.  Now that we don’t have a sewing machine we’re going to have to fashion curtain rod pockets on the bottom (after cutting to size).  Some weeks ago Peg tried a test using fabric glue.  That seemed to hold up just fine so we’re going to try gluing the bottom rod pocket and see how well that works.

We’re not talking about a huge investment here.  New curtain rods totaled up to about $8.00 and we found pre-made curtains on sale at Kohl’s on sale for $13.00 for one and the second one for $1.00.  So for $22.00 plus Texas state sales tax we have what we think will be a workable improvement.2015010213543804

AND….

They won’t rattle as we drive down the road.  It’s not a huge issue — the sound of mini-blinds hitting the door/wall as we bounce along the road but it IS noticeable.

Pictures to come when we finish the project.

Thanks for stopping by today.  I’ll talk with you tomorrow.


I Fixed It! (Continuously Learning)

First I have to share another grocery shelf item. Slap Ya Mama I saw this today and I stopped dead in my tracks! What a name for a product!  As you can see it’s a Cajun Seasoning product and we are definitely within range of cajun cooks. OLYMPUS DIGITAL CAMERA A few days I actually purchased a bottle of Gumbo Roux, with which I have been very happy thus far.  It’s so fun taking time as you wander through a grocery.

Just an update on that toaster oven that we bought a few  months ago.  We have in fact been using it much more often than had we used the old toaster which got left behind in Milwaukee. AND, it lives on our next-to-the-dining-table counter so that it’s much more convenient to use.  toast r oven

Time till our departure for New Orleans is dwindling. I’m enjoying being retired.  Puttering around, getting more exercise, cooking, talking with my wife.  I had been asked a couple weeks ago how long it takes to get over the guilt about being retired and enjoying life so much.  I don’t think I had even thought about post-retirement ‘guilt’ until the question was put to me.  And the more time passes since the question was put, the more I realize how much I like being retired.  We both worked long hard hours to get to this point and a good number of our contemporaries have passed from the scene, or will never have the freedom we are enjoying right now.  No one knows how long this period of life will last but it’s sweet.  When Peggy worked for Aurora Healthcare she worked 50+ hours every week for years, their offices were moved into places that I never could believe the O.S.H.A. people hadn’t shut them down.  Their organization grew so rapidly that they were moved from one industrial setting — being remodeled  to offices — to another one.

I worked long hard hours during the years I drove commercially, I worked long hard hours when I was self employed.  I’m finally getting to the point that I don’t wake up every day at 4:00 a.m. ;  occasionally I actually sleep in until 7:30 — I can’t remember how long it’s been before the last few weeks that I could do that.  Guilt?  No.  No guilt at all.

Can you fix it if it’s not broken (and you just don’t know how to work it?)

When we bought Serendipity we knew she had surround-sound installed — the dealer had it all cranked up while we were touring it the very first time.

When we took delivery of Serendipity the last thing on my mind was worrying about the surround sound when there were so many other completely different and new things to be learned.  To be honest we were several months and on our way East from Oregon before I even thought about it again.

In the meantime I had disassembled the old tube-type television installation and replaced it with our new LED TV.  There were an excess of speaker wires that I lost track of from whence they had been disconnected — not a good practice (not to label as you disassemble) but there you have it, I’m not much of a mechanic.

2014110817545001
Now when our son in law Micheal comes to visit (hopefully this winter) he can listen to GOOD sound!

Well, yesterday I got to thinking about our lack of Surround sound — I mean we have a 12 x 12 x 10 woofer box taking up most of one of our few precious lower cabinets and doggone it all I wanted the use of that cabinet or that woofer was going bye-bye.  I spend a good part of the morning thinking about it when my central processing unit was sharing cycles (I was multi-tasking).  Then it dawned on me.  We have not been using the BluRay player that lives in the same upper cabinet as the satellite box. Could it be that some setting on the BluRay box might be the switch to activate the surround sound?

It took a while, playing with the machine setup menu until I found a combination of settings that turned on the Surround Sound.  So, to make a long story short, I got it to work but it wasn’t ever really broken — just “operator error.”

But — we now have better sound.  As you know, as you get older your hearing goes. 🙂

And there you have it — that list of projects keeps getting worked on one item at a time.  It’s not going down quickly; but it’s going down!

By the way…. we moved some of the kitchen storage around yesterday.  A plan of attack is beginning to formulate for one of the upper kitchen cabinets using that same closet shelving that our friend Bob Flanigan used in the basement storage — except I’m thinking of dividing the cabinet above the sink for better storage of dishes, cups, glasses, and wrapping materials (waxed paper, plastic wrap, and aluminium, & parchment paper).  We would not tackle that project until we arrive in New Orleans, or perhaps until we arrive in S. Texas.

Thanks for stopping by, and I’ll talk with you tomorrow.